| Polymer Clay tools that I use and recommend |
|
||
| Bookmark this page and check back frequently since the list of polymer clay tools will grow as I get a chance to write about the different tools that I use. | |||
 |
|
||
Search Results
Polymer Clay Tools
On March - 15 - 2007
Polymer Clay History
On September - 9 - 2009
What is Polymer Clay
Polymer clay is a material you can sculpt. It is based on polymer polyvinyl chloride (PVC) material. It usually contains no clay minerals and is only called “clay” because its texture and properties resemble mineral clay. Polymer clay is sold in craft, art and hobby stores. It is used by artists, hobbyists and children.
All polymer clay brands include PVC and one or more liquid plastic. Pigments may be added to the base to create colors along with small amounts of kaolin or white china clay. Mica may also be added to make a metallic looking clay.
Welcome – Polymer Clay Fan
On August - 7 - 2009
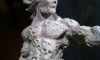
Polymer clay example
Polymer clay is a unique sculpting medium that offers a versatility unmatched by any other product in its class. Although other sculpting mediums, such as waxes, may allow more ease for sharper details no other medium can duplicate polymer clays ability to easily create a completed work of art. Details are not foreign with polymer clay either, with enough time and practice anyone can create highly detailed artwork using nothing but polymer clay.This site is a collection of information, tips and sculpting tutorials for my favorite sculpting mediums…Polymer Clay.
My name is Gerald Gore and I am a self taught sculptor. The tutorials on this site are a step-by-step pictures of some of the sculptures I have created. You can read more about me and how I got started sculpting on the About page.
Polymer Clay Art
On August - 5 - 2009
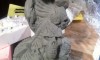
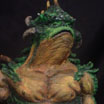
Polymer clay is a very versatile and wonderful medium to work with. Whether your polymer clay art interest is jewelry, wildlife art, dolls, figurines or other polymer clay projects, there are no limitations to the quality of work that you can do. Listed below are examples of a few sculptures created in Polymer Clay.

Polymer clay angel
Polymer clay wildlife sculpture
 Read the rest of this entry »
Sculpting with Wax vs Polymer Clay
On July - 31 - 2008
Stop the press, isn’t this site suppose to be about polymer clay sculpting, after all the name of the site is Polymer Clay Fan! Yes you have read the title to this post correctly, I’ve started playing with wax lately and although I’m still wet behind the ears I thought why not put together a little post to compare the two mediums. I’m sure a few diehard polymer clay artists may snub their nose at this post but I recommend reading through the entire article before jumping to a conclusion. This isn’t an article about discrediting wax or even polymer clay, it is just my observation of the positives and negatives the two different mediums have to offer.
Using Alcohol on Polymer Clay
On May - 31 - 2007
Using Alcohol With Polymer Clay
Rubbing Alcohol is a great tool that is used to help smooth and blend polymer clay when sculpting. Like the Vaseline tutorial, I have several other tutorials where I give examples on how I use alcohol while sculpting (I’ve included a few examples at the bottom of this page). When I first started sculpting I used water based clay (I had never even heard of polymer clay at that time). With the water based clay I was able to achieve a smoothing and blending effect by using a wet sponge or Q-tip. However, when I started using polymer clays, water did not have the same effect. At first I tried to use water and Q-tip on my polymer clay but the results were pretty poor. After doing a lot of research on the internet I discovered that rubbing alcohol dissolves polymer clays. Thanks to other polymer clay artist I was able to learn that alcohol on a Q-tip, sponge or paint brush has the same effect as water on water based clay. I have experimented with different potencies of rubbing alcohol and found that not all are created equal.
Polymer Clay Vase
On May - 26 - 2007
Creating a Marbled Vase
This is a quick and easy tutorial that will demonstrate how to take a plain Jane glass vase and turn it into a work of art with the help of a little polymer clay. This is the first time I have ever done something like this myself so at the end of the page I will cover some lessons learned.
This really is a simple tutorial and I’m convince just about anyone can easily create a marbled vase. If it seems a little challenging at first then just keep practicing and it will come to you in no time at all.
The polymer clay I am using for this particular piece is Premo.
 |
No need to cringe, you do not need that much clay for this tutorial. I was shopping at my local Hobby Lobby and went a little overboard on the clay. All is good since I will have plenty of clay for future projects. To give you an idea on how much clay you will need, I ended using less than one block of two or three colors by the time the vase was completed (My glass vase is around five (5) inches tall).Note: Make sure the glass vase that you purchase can be baked in an oven. |
 |
The first step is to condition the clay. Premo is a little firmer then the clay I normally use, Super Sculpey, so a pasta machine comes in handy here. I’m only using two colors on my vase so I keep rolling out the clay until it is fully conditioned. |
 |
The next step is the mix the two colors together and roll them both through the pasta machine. I repeated this step several times until I got a design I was happy with. Just roll the clay, fold, squish it together and roll it again. You don’t want to fully blend the clay, the key here is to keep the marbled look. |
 |
Simply press the clay onto the glass vase. I started from the bottom and worked my way up on this piece. |
 |
Still applying clay to the vase. |
 |
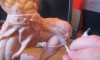
Using one of my dental tools I blend the individual pieces together. Spend some time on this stage since you want the clay to look as if it was on piece. Try to avoid parting lines if possible. |
 |
Once you create your own vase you will see how easy this tutorial really is. I personally like to try and take things to the next level when I create my art. A marbled vase is cool but a marbled vase with art hanging off of it is much cooler. I sculpted an Indian on my vase just to give it a little something extra.Tip: To cure the piece bake it in the oven at 275 degrees for 30 minutes (per 1/4 of an inch). |
 |
A side view of my vase.Probably 98% of the colors on this vase are made up of clay. I added a little paint to tint the skin but other than that no paint was applied to this piece. |
Lessons Learned
As I stated at the beginning of this tutorial, this was the first time I have tried something like this. The vase was a good learning experience for me and I did learn a few good lessons along the way. Here are a few tips I plan to use in the future:
1. Wear surgical gloves when sculpting a vase – No issues with the skin here, I just ended up with tons of fingerprints in my piece. Latex gloves would have been a quick and easy solution to avoid any fingerprints. Alcohol can remove the fingerprints but that is a lot of extra work.
2. Don’t rush the project – in all honesty this is not my favorite piece that I have created. I have a lot of other projects I should have been working on but just had to give this idea a try. I only gave myself a few hours for this piece and now looking at it I wish I would have set aside a little more time. All is not lost since I really did learn a lot by creating this vase.
3. Keep your area clean – key warning here, little clay particles lying around will somehow end up in your lighter clays. Also be sure to clean off the pasta machine before mixing different colors of clay.
That’s it! I’ll be sure to do more vases in the future and will probably show more of the sculpting stages in the process. The goal for this tutorial was to show you how you can mix glass and polymer clay to create a piece of art.
Until next time,
– Gerald
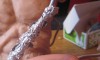
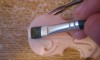
Dental Tools
On March - 18 - 2007
Using Dental Tools for Sculpting
When I first started sculpting with Super Sculpey I went out and purchased a little $5 set of plastic sculpting tools at my local Hobby Lobby. These tools were great for the time and I used them consistently for about a year and half to two years. However, as my skills improved I started to realize the limitations of my starter set of sculpting tools.
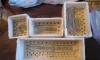
Now I had heard through the grapevine that dental tools were great for sculpting. They come in a variety of sizes and shapes and best of all are made of metal. I first started by asking my local dentist if they had any old tools that they were disposing of. After a few crazy looks it was clear that I should just break down and go out and buy a set of my own. To my surprise I found a set of 18 dental tools on Amazon.com for a price around $25. I was skeptical at first but thought for that low amount of money it was worth taking the risk.
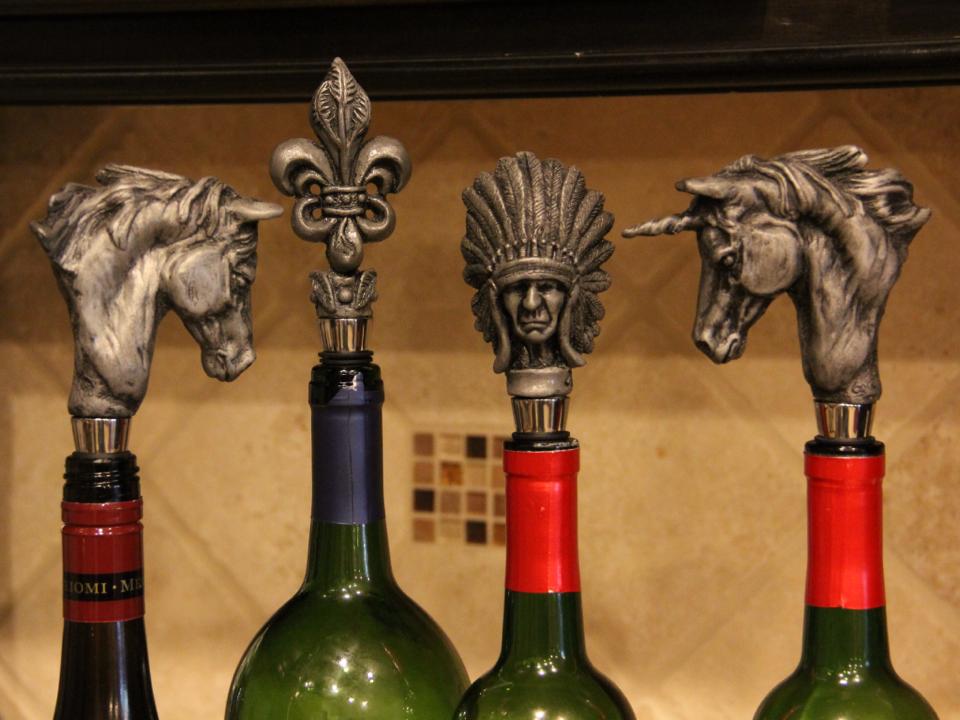
Functional Art – Creating Unique Wine Stoppers
On November - 26 - 2014
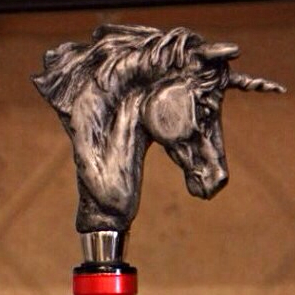 Over the past few years I’ve gravitated from creating what I would consider more conceptual to functional based art. I still enjoy sculpting statues and figurines, that will always be a part of me, but I have to admit that creating a unique functional piece of artwork has a strong appeal to me. Not only is the artwork fun to look at, it’s also a great way to create an engaging conversation piece.
I started my functi0nal art journey a few years back making cigar related tools and as of late have spent a great number of hours creating art for the wine enthusiast. What’s intriguing about creating this type of art it that it really stimiluates my own creativity. I look at the world with a different view in that any and every item I interact with has an opportunity to also because an artistic centerpiece. Napkin holders, coasters, light switches, etc and etc offer endless opportunities to create something that is functional yet an attraction for its design and beauty.
If you have never created a functional piece of art then I highly recommend you give it a try. Push yourself with the design, make the challenge something that you have to give your very best effort. In the end no matter what you make, or how the design ends up, I truley believe you will grow as an artist. After all I’ve never grown much from my easy projects, it’s the ones I wanted to throw in the trash that really developed my skills. For me sculpting wine stoppers pushes the envelops of my creativity. I have to sculpt smaller than I prefer and on top of that I’m tasked with trying to create an appealing design that will rest on top of a wine bottle.
Go out and find your niche and try something new. Struggle with the project, push yourself, don’t give up and in the end I’m confident you will be a better artist for it.
If you would like to check out my latest endeavors you can view them at my
Etsy shop – www.etsy.com/shop/gorecollection or my website – www.gorecollection.com.
All the best,
Gerald Gore
Great Classroom Projects With Free Art Lesson Plans
On October - 3 - 2009
We know how difficult it is to come up with new and yet inexpensive ideas for classroom art projects. Our staff is always on the alert for great new ideas (if you have any, let us know! We are always adding to our library of free downloadable lesson plans). Our art lesson plans are either in PDF format or PowerPoint presentations, and they can be downloaded absolutely free. For elementary school students there are easy-to-follow explanations of lithography; portrait sculpture in clay; dinosaur bone clay relief sculpture; polymer clay bead making; prehistoric cave art; and even making clay skulls to celebrate Mexico’s Day of the Dead. For high school students there are more advanced art projects such as multi-color printing; sculpting insects with polymer clay; relief sculpture; making reproductions of Chinese vessels in bronze; sculpting life sized heads and ceramic self-portraits. There is also an Introduction to Glass in the Classroom; making fused and slumped warm glass objects d’art; glass casting; and glass jewelry making. Read the rest of this entry »